DevLost

A developer lost in the mountains

Sense/Net: deploy a Content Type in your web application

Continuing the journey in Sense/Net, after my first post where I highlighted some hints to speed the process of creating a development environment, I want to spend two words on the following Sense/Net wiki how-to: How to create a ContentHandler.

It explains how to create a content handler for the content types you may have included in your custom business logic.

Btw, "Content Type" is an important bluilding block of Sense/Net platform: it is a collection of reusable settings that define the attributes and behaviours of a specific kind of content. From a conceptual point it is identical to a Sharepoint Content Type, what differs is the implementation.

The how-to above mentioned is clear and easy to follow, but on point 7, after the creation of the content handler, it suggests you to install the relevant content type through the on-line Content Repository. This is not what I want, because you may end with the result of a content handler not aligned with the content type previously defined, it is up to you to keep them synchronized.

Why not install or modify your content type during the building process? After all, this would be the best way to keep in sync both the content handler and the content type.

After a series of attempts I finalized the following procedure:

1. Put your CTD xml file under /Root/System/Schema/ContentTypes/ folder as in the image below:


if you do not have the full tree but just the Root folder, create it from inside Visual Studio.


2. Add a post-build event.


and insert the following commands:

$(TargetDir)Import.exe -SOURCE $(ProjectDir)Root -TARGET  /Root -ASM $(TargetDir) -SCHEMA  $(ProjectDir)Root\System\Schema
$(TargetDir)Indexpopulator.exe

The first line imports in the content database what is contained in the Root folder of your web app. The second line runs indexpopulator.exe to reindex the content repository. Make sure you have import.exe and indexpopulator.exe tool on your bin webfolder. 

Conclusion:

The architecture of Sense/Net allows you to define a content type as a set of properties and attributes to be assigned to a specific kind of content, in a way that is very similar to what Sharepoint does. This is great because you do not have to rethink integrally to your project from the basis if you want to migrate it to Sense/Net. 

In this post I showed how we can leverage a post-build event of Visual Studio to ensure that both the content handler and the content type are installed at the same time so that you can minimize wrong reference errors. This trick may be applied to other cases.

First journey with Sense/Net: development environment setup

This is the first post of my journey with Sense/Net.

Why Sense/Net?

Recently my company wanted to broadening its CRM services, looking for an alternative to custom Sharepoint solutions, better if open source. Looking around, we found a very promising product: Sense/Net (sensenet.com).

Sense/Net is an ECM system which claims to be an alternative to Sharepoint. It includes features like workspace-based collaboration, document management, business process management, web content management and, last but not least, is open source.  

The question is: is Sense/Net really comparable with Sharepoint in terms of features?

Answering to this question would require to map each feature of Sharepoint to the corresponding feature of Sense/Net. This is an exercise I'm not going to do. Instead, for a subset of features that we are interested in, we want to verify on what extend they are supported by Sense/Net. I mean "verify" from a developer point of view.

So, one of the things we appreciate of Sharepoint is the possibility to customize and add new functionalities through a series of project templates in Visual Studio that provides you with a skeleton of a basic project or a Visual Web Part and so on. Once you created your project you can easiliy add new items from a list which includes for instance event receivers, web parts, workflow, business data connettivity etc.

Sense/Net does not provide you with similar "amenities", at the time of writing. What it is suggested on Sense/Net wiki page is to set up a development environment through 14 steps. Let's give a try.

My test was made on a Windows 8.1 machine with IIS 8.5, Visual Studio 2015 and SQL Server Express 2012, using Sense/Net community ed. 6.5.3.8649.

To be honest, I struggled a bit before to have a working environment, but at the end I was able to start my web application and even debug it. Here are some hints to speed up the setup.

Point 1 requires you to install an MSBuild Extension Pack, without specify which version, x86 or x64. I experienced that x64 choice is the wrong one, so.. install x86 version.

On Point 3, in the connection string in your Web.config, set "Data Source =.\sqlexpress.." instead of "Data Source =." if you are using Sql Express. The same consideration is valid for point 5, when editing the connection string of the config files.

Point 7 requires you to create the folder "SenseNetReferences" and copy in it all dlls from the Sense/Net webfolder bin. After that you have to reference a short list of some of these dlls in your web application. I experienced that it is not enough. I started by adding one by one the missing references according to the build errors; after 10 additions I got bored and referenced all was in "SenseNetReferences" folder and that worked.

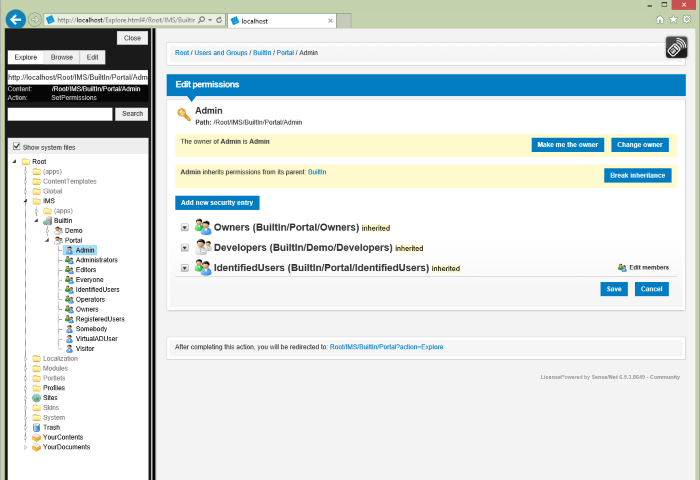
On Point 10 you have to create a deployment batch file to create the database and the initial environment. Apparently, once the batch file ended its work and after you set up an IIS web site for your web app as in point 14, all seems OK, but.. when you navigate on localhost for the demo Sense/Net web site and log in as admin user, you'll experience a lot of permissions issues, for instance you (as admin) cannot navigate through the Content Explorer tree, instead, the predefined developer profile can. The developer profile can open the root console but the admin cannot. On a deeper investigation I found out that admin user did not belong to the Administrators group.


I was able to solve the permissions issues adding in the deployment batch file, the option "-RESETSECURITY" in the line that imports the default content repository as below:
..\Source\MyWebApp\MyWebApp\bin\Import.exe -SCHEMA ..\SenseNetRoot\Root\System\Schema -SOURCE ..\SenseNetRoot\Root -TARGET /Root -ASM ..\Source\MyWebApp\MyWebApp\bin  -RESETSECURITY 

I simply copied this option from the "InstallSenseNet.bat" file that you can find in the Sense/Net source code.I guess it was forgotten in the wiki page. 

Conclusion

From this first taste, I can say that Sense/Net does not offer anything out of the box in terms of Visual Studio templates, add-ins etc that makes developer's life a bit easier. Set up a working development environment, as I did, it is whitin the reach of any developer, but some might be discouraged given the number of steps required. 

I think it could be worthwhile to create a a VS template that allow to save some steps. 

On the other side, you have the source code to look into in order to solve any issue you may encounter and this is, in my opinion, a great added value. 


Assembling pdf files from different sources - part 1

Let’s suppose you want to create a pdf as a result of a mixture of data and information coming from different sources; and, suppose you want to automatize the creation process.


In my case I had to face a similar challenge when I was asked to assemble a pdf based on the following sources of information:

  • Sharepoint lists
  • Existing pdf files
  • Existing images

Features to be provided included:

  • Easy look&feel upgradability  (covers, header’s and footer’s images)
  • Text modifications of some parts without coding
  • Automatic generation of internal bookmarks
  • Automatic generation of the table of content

What to do then?

After some investigation I got just the thing: PDFsharp & Migradoc library.
It is a double-face c# library, double-face in the meaning that it provides a low level library (PDFsharp) to interact with pdf objects and a high level library (MigraDoc) which adds an abstraction layer that allows to think in terms of sections, headers, chapters, paragraphs etc.

The solution to the scenario described above involved the use of both:

  • PDFsharp to concatenate two or more pdf files
  • MigraDoc to create various sections of the document
  • MigraDoc Document Description Language to modify some text formatting included
  • PDFsharp to add page numbers to the whole document
  • MigraDoc to add internal bookmars
  • MigraDoc to create the table of contents

The strategy adopted was the following:

  1. Create all the sections needed for the document included those which will be populated by external pdf files.
  2. Add headers and footers to the sections created above
  3. Create all the bookmarks needed when creating the sections above; this step is important for the internal links to be correctly resolved and the table of contents to be build accordingly. In fact, if you add content with references to parts of document which at the time are not present, you get an unresolved link error. It does not matter if they are filled with content or they are just blank pages at the moment, what matters is that they exist and are bookmarked.
  4. Fill the remaining parts of the document importing Sharepoint data and mdddl files.
  5. Create the table of contents.
  6. Inject the external pdf files in the sections foreseen above
  7. Add page numbers. This action at the end of all the operations to be sure not to exclude any pages.

Implementation

Let me skip the “getting started” part of PDFsharp& MigraDoc, you can find exhaustive tutorials on the product web site, and jump to the interesting parts.

First of all, prepare the MigraDoc document:

void PrepareDocument()
{
    // Create a new MigraDoc document.
    document = new Document();
    document.Info.Title = "GUIDELINES";
    document.Info.Subject = "Guidelines for working group";
    document.Info.Author = "Ab";
    PageSetup pageSetup = document.DefaultPageSetup.Clone();
    // set orientation
    pageSetup.Orientation = Orientation.Landscape;
    Guide_Creator.Classes.Styles.DefineStyles(document);
}


Then create all default sections you need:

public void AddDefaultSection(string sectionName)
        {
            var section = document.AddSection();
            section.Tag = sectionName;
            section.PageSetup.Orientation = Orientation.Landscape;
            section.PageSetup.TopMargin = "25mm";
            section.PageSetup.BottomMargin = "25mm";
            section.PageSetup.LeftMargin = "25mm";
            section.PageSetup.RightMargin = "25mm";
            section.PageSetup.HeaderDistance = "10mm";
            section.PageSetup.FooterDistance = "15mm";
            section.PageSetup.MirrorMargins = true;
            section.PageSetup.OddAndEvenPagesHeaderFooter = true;
        }


For instance, you can add an Introduction" section with a cover image and a bookmark in this way:

        public void AddIntroSection()
        {
            AddDefaultSection("RetroCoverSection");
            document.LastSection.AddParagraph();

            // add a page break
            document.LastSection.AddPageBreak();

            // Add the "intro" section to the document.
            AddDefaultSection("IntroSection");

            // add cover
            var img = document.LastSection.AddImage("covers\\intro.png");
            img.Height = "21cm";
            img.Width = "29.7cm";
            img.RelativeVertical = RelativeVertical.Page;
            img.RelativeHorizontal = RelativeHorizontal.Page;
            document.LastSection.AddPageBreak();

            // Add a bookmark
            string titleSection = "INTRODUCTION";
            var par = document.LastSection.AddParagraph(titleSection);
            par.Format.Font.Color = Colors.Transparent;
            par.Format.SpaceBefore = "1mm";

            bCreator.AddBookmarkMigraDoc(par, titleSection, titleSection, typeOfBookmark.part);
        }
        
        /// <param name="par"> paragraph</param>
        /// <param name="bookmarkName"> name or key name of the paragraph</param>
        /// <param name="bookmarkTOC">name of the paragraph as it appears in the Table Of Content</param>
        /// <param name="bkType">bookmark type</param>
        public void AddBookmarkMigraDoc(Paragraph par, string bookmarkName, string bookmarkTOC, typeOfBookmark bkType)
        {
            if (bkType == typeOfBookmark.part)
            {
                par.Format.OutlineLevel = OutlineLevel.Level1;
            }
            else if (bkType == typeOfBookmark.chapter)
            {
                par.Format.OutlineLevel = OutlineLevel.Level2;
            }
            else
            {
                par.Format.OutlineLevel = OutlineLevel.BodyText;
            }
            par.AddBookmark(bookmarkName);
            // update list of bookmarks; it is needed when adding internal links
            bookmarkList.Add(new Bookmark(bookmarkName, bookmarkTOC, bkType));
        }

Continue on part 2


Cygnus and the multitenant option of Orion context Broker: how to make it work

Some time ago I posted this question on Stackoverflow:

how to make the multitenant option of Orion context Broker working with Cygnus connector?

Since I was not receiving any answer and I was getting impatient :-) I squezeed my brain to look for a solution on my own and when I found out the solution I answered to the question on Stackoverflow.

All done? Yes, but I think it's worthwhile to add more pieces of the puzzle and share more of our experience with FIWARE GEs.

The fact is that, for our Smart Attention Project, we need to save historical data whereas Orion Context Broker keeps just the last data received. One of the suggested methods is to persist data into a mySql instance using the Cygnus connector bundled with Orion.

As we have to manage several mesh networks (from 1 to 10 or even more) that use the same entities/attributes/subscriptions definitions we wanted to leverage the multitenant option of Orion Context Broker in order separate data coming from different networks. According to the user and programmers guide of Orion, a specific HTTP header "Fiware-Service" should be added to each HTTP Request coming from the gateways of the mesh networks in order to persist data into different databases.

Furthermore, if you want to store the information for each entity in a different table, you need an additional header: "'Fiware-ServicePath".

In brief, if you want different DBs for different scenarios and different tables for different NGSI entities you should add these headers:

'Fiware-Service: DB_name'

'Fiware-ServicePath: table_prefix'

then, you should obtain:

dbName=DB_name
tableName=table_prefix_<entityId>_<entityType
>

But, if you do so, probably you won't be able to get it work. Why? Just because Orion documentation does not clarify that you have to include these headers in all the NGSI REST call to Orion Context Broker, not just once or just for the registration of an entity.

If you already have your entities registered, simply delete them (delete also the subscriptions) and follow these steps to make things work:

1) Register your entity with a POST /NGSI10/updateContext call specifying "APPEND" updateAction in payload and including "fiware-service" and "fiware-servicepath" headers.

2) Make a subscription (/ngsi10/subscribeContext) to Orion including exactly the same headers above

3) Update your entity including always the headers above